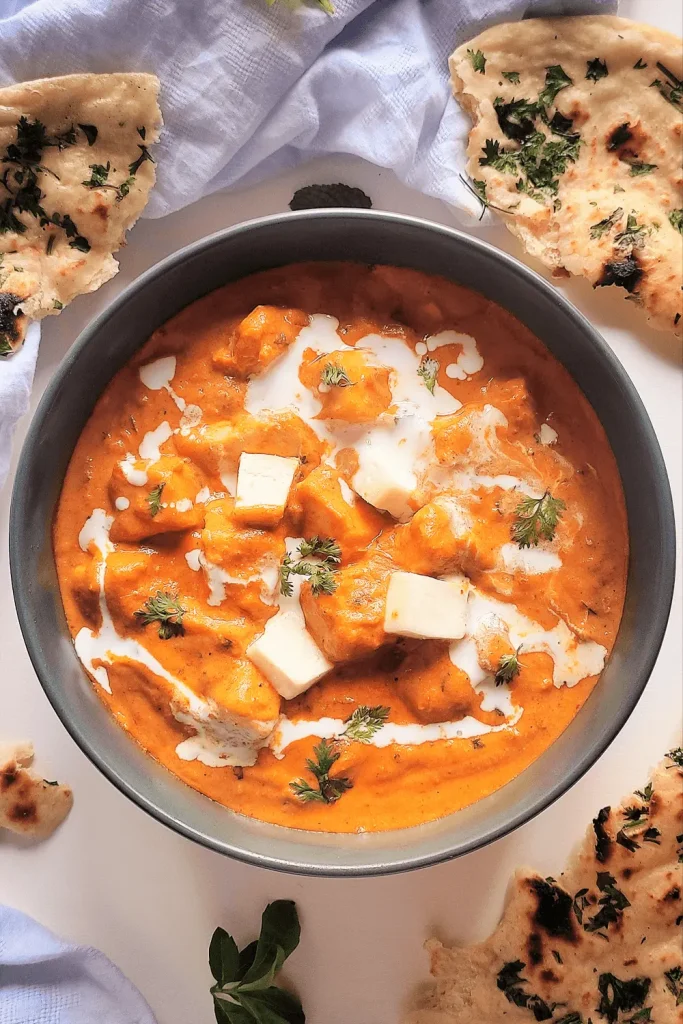
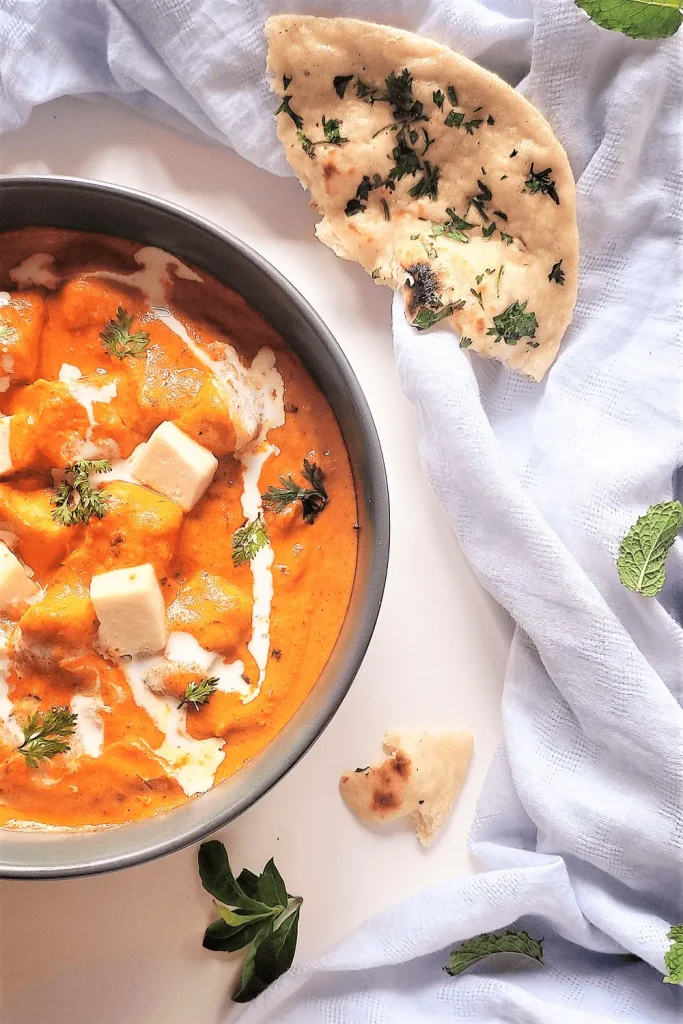
Take some soft, flaky Butter Nun and dip it in the rich, creamy, buttery gravy of the Paneer Butter Masala recipe. It melts down in your mouth. Feel the taste. It is incomparable!
I just can’t get enough of North Indian food! From butter chicken to paneer tikka masala, paneer makhani, and paneer butter masala, I love them all!
There are hundreds of ways to make those dishes, but I always go for easy and simple methods that don’t compromise authenticity.
Today, I am sharing my favorite dish – Paneer Butter Masala Recipe, made in the simplest way possible. Trust me, it’s absolutely delicious!
Give this recipe a try and I am sure you won’t be disappointed.
What is Paneer Butter Masala?
Let’s talk about paneer butter masala – a mouth-watering Indian dish that’s sure to make your taste buds dance with joy!!
Sounds yummy! Right?
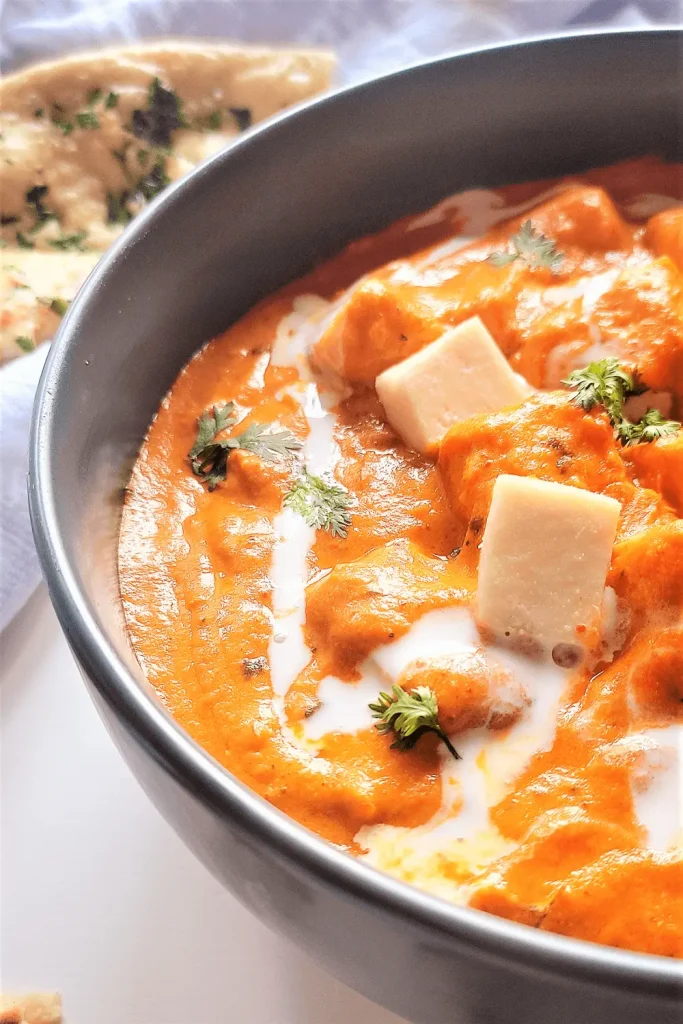
This delicious dish is made by adding paneer cubes into a creamy tomato sauce infused with aromatic spices. The combination of the soft paneer and flavorful sauce is truly irresistible.
Paneer butter masala is popular in Indian restaurants all over the world. It’s often served with rice or roti, an Indian flatbread.
And the best part?
You can adjust the spice level to your liking, so it’s perfect for everyone, from those who love mild flavors to those who crave something spicier.
So, why not give the Paneer Butter Masala Recipe a try at home? It’s a simple yet tasty dish perfect for sharing with family and friends. Trust me, once you taste it, you will be hooked!
What is the difference between Butter Paneer (Paneer Makhani) and Paneer Butter Masala?
Well, let me break it down for you!
Both dishes come from North India and have a similar concept and outcome – a thick, creamy, and buttery gravy with cubed paneer added to it. However, there are two key differences.
In Butter Paneer or Paneer Makhani, the paneer pieces are fried in butter before being added to the gravy. But in Paneer Butter Masala, the raw paneer pieces are added directly to the gravy at the end.
Another significant difference is that Paneer Butter Masala undergoes a second tempering, while Butter Paneer or Paneer Makhani doesn’t.
So there you have it!!
I know some of you may be wondering about the recipe for Butter Paneer too. Don’t worry, I’ve got you covered! I’ll be sharing the easy-making procedure for that dish another day, so stay tuned.
Now, let’s focus on making the perfect Paneer Butter Masala together. Get your aprons on and let’s get cooking!
Can we use Paneer Butter Masala gravy for Butter paneer or Butter Chicken recipe?
The answer is a resounding YES! And it’s super easy to do.
For Butter Paneer, all you have to do is take the Paneer Butter Masala gravy and add cubed paneer to it. You may want to add a little butter or cream to balance the flavors and adjust the spices according to your taste.
Similarly, for Butter Chicken, use the same gravy and replace the paneer with diced chicken. Just make sure to adjust the spices and add some butter or cream to get the perfect taste.
See how easy it is? With just a few simple adjustments, you can create delicious Butter Paneer and Butter Chicken dishes using the Paneer Butter Masala gravy.
Can we store the Paneer Butter Masala gravy?
Absolutely! Storing the gravy is easy and convenient. Here’s what you need to know:
First, let the gravy cool down to room temperature. Once it has cooled, transfer it to an airtight container. Make sure the container is clean and dry before adding the gravy.
Next, place the container in the refrigerator. The gravy can be stored for up to 4-5 days in the refrigerator.
If you want to store the gravy for a longer period, consider freezing it. The gravy can be stored in the freezer for up to 2-3 months.
When you’re ready to use the gravy, simply take it out of the refrigerator or freezer and let it thaw. You can heat it up on the stove or in the microwave.
However, keep in mind that the texture and flavor of the gravy may change slightly after freezing and thawing. To ensure the best flavor and texture, it’s recommended to consume the gravy within the recommended storage time.
So, go ahead and store your Paneer Butter Masala gravy with confidence, knowing that you can enjoy its rich and delicious flavor even on busy days!
What is Kashmiri Red Chili Powder? Why use it instead of regular red chili or paprika powder for the recipe?
Are you curious about Kashmiri Red Chili Powder and why it’s used in some Indian dishes instead of regular red chili or paprika powder?
Well, let me tell you!
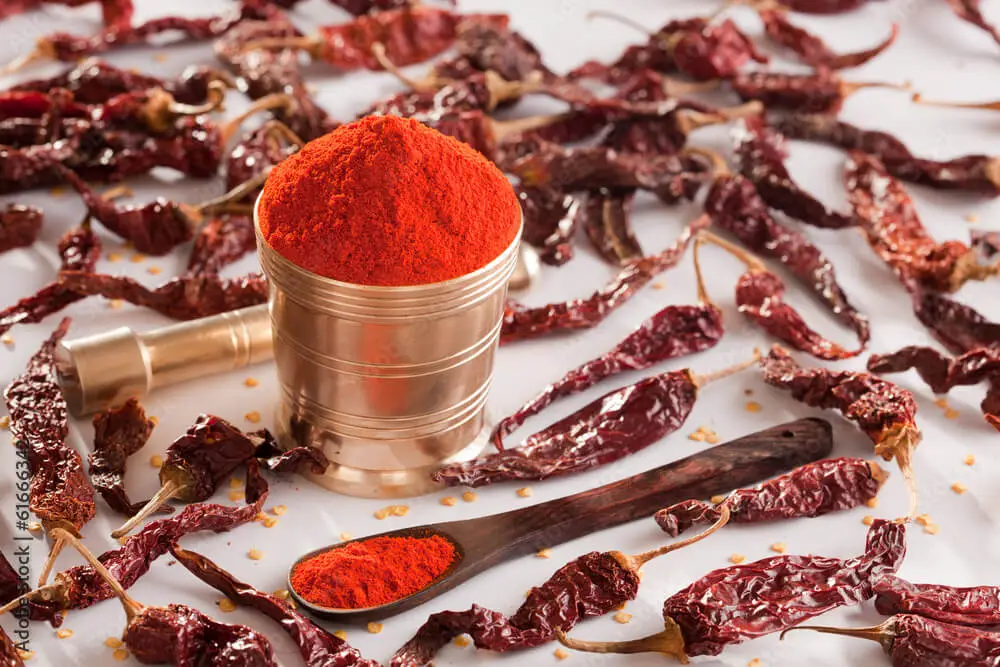
Kashmiri Red Chili Powder is a type of chili powder that’s commonly used in Indian cuisine. It’s made from dried red chilies that are ground into a fine powder. But what sets it apart is that the chilies used to make it are typically smaller and less spicy than other types of chilies. This gives the powder a bright red color and a milder, slightly sweet flavor.
Kashmiri Red Chili Powder is often used to add color and flavor to dishes such as curries, marinades, and spice blends. And it’s not just for cooking – it can also be used as a natural food coloring agent.
So why do chefs use Kashmiri Red Chili Powder instead of regular red chili or paprika powder in dishes like Paneer Butter Masala?
Well, the answer lies in the dish’s color and spice level. You see, Paneer Butter Masala is meant to have a beautiful yellow-orange color, and using Kashmiri Red Chili Powder along with fresh cream helps achieve that perfect hue.
Plus, the dish shouldn’t be too spicy. Using regular red chili powder or paprika powder could make it too hot, and adding just a little bit of chili powder to avoid the spiciness could throw off the color. So to balance and maintain the authentic taste and color, chefs stick with Kashmiri Red Chili Powder.
Not only does Kashmiri Red Chili Powder add a unique flavor and color to dishes, but it also has some health benefits, such as aiding digestion and helping to reduce inflammation.
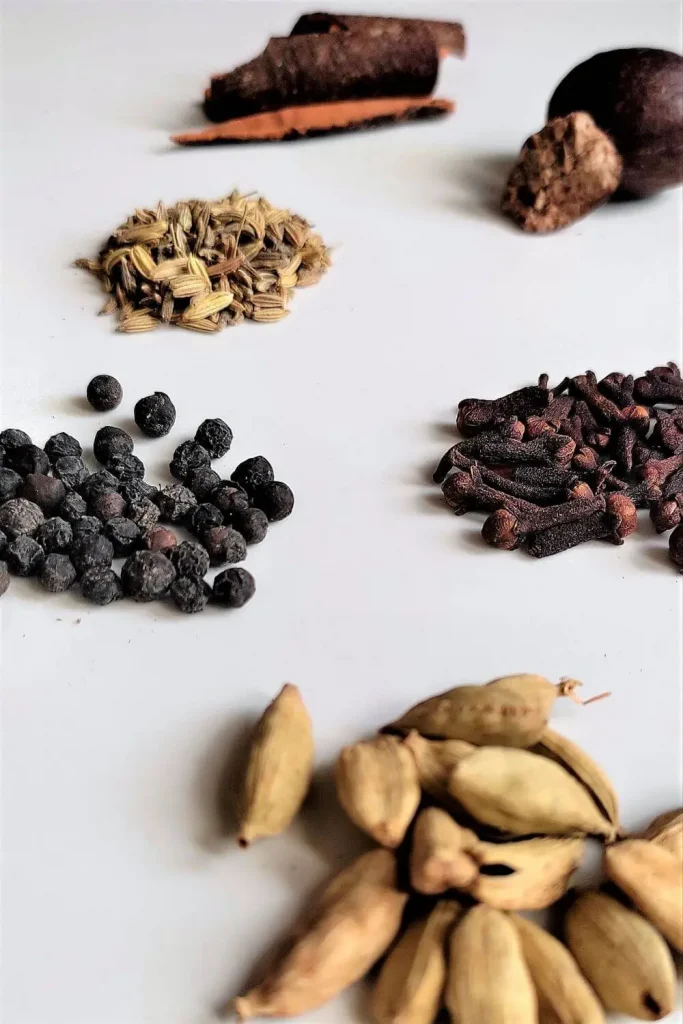
What is Garam Masala Powder (Hot spices powder mixture)? How to make it at home?
Garam Masala Powder is a blend of ground spices that is practically magical. It’s like the secret spice blend that can make your food taste ten times better! It’s a must-have for Indian, Bangladeshi, and Pakistani dishes, but it’s also used in Nepalese, Sri Lankan, and Caribbean cuisines.
There are 2 versions of this spice blend – Regular Garam Masala and Shahi or Royal Garam Masala.
Regular Garam Masala includes cinnamon, green cardamom, cloves, black pepper pods, and bay leaves.
While the Royal version also adds mace, nutmeg, black cardamom, and star anise to the mix. Fancy, right?
But why buy it when you can make it yourself?
Making Garam Masala powder at home is easy-peasy. To make the regular one, just have to dry roast 40 grams of cinnamon, 20 grams of green cardamom, 1 tablespoon of cloves, 1 tablespoon of black pepper pods, and 5 to 6 bay leaves in a frying pot. After roasting, let them cool down a little bit. Grind the spices in a mixer blender.
Done? It’s Ready now!! You can store your homemade Garam Masala powder for a month in an airtight jar.
Using Garam Masala powder in my Paneer Butter Masala recipe is a game-changer. The flavors are warm and complex, and they add depth to the dish. But you don’t have to limit yourself to just curries, soups, or stews. Get creative and add Garam Masala powder to any dish that needs a flavor boost. Plus, you can experiment with different spice ratios and make it just how you like it!
So why not impress your friends and family with your new culinary skills? Make your own Garam Masala powder and let the magic happen in your kitchen!
How to serve Paneer Butter Masala? what are the best side dishes to enjoy it with?
First things first, butter paneer masala deserves to be served with love and care. I always set the table with my finest tableware and cutlery sets. It’s all about creating a special atmosphere for this special dish.
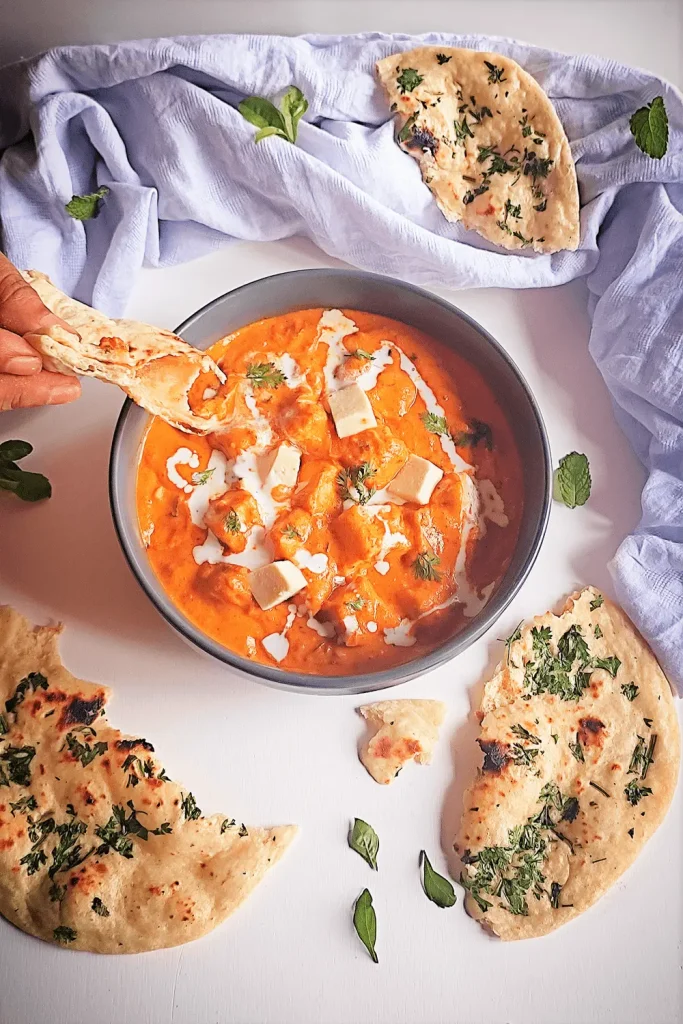
Now, let’s move on to the sides. Of course, butter naan or kulcha (similar to butter naan with coriander leaves and seasoning on top) is an absolute must with butter paneer masala. It’s a match made in heaven!
But, if you’re in the mood for something else, you can also serve it with plain steamed rice, pulao, jeera rice, and roti. And if you really want to take the experience to the next level, try serving some cold cucumber raita and yogurt lassi on the side.
Remember, presentation is key, so take your time and make it look beautiful. And most importantly, enjoy every bite of your delicious Paneer Butter Masala!
Equipment used for this recipe
- Curry pot
- Mixer blender
- Air tight jar
- Air tight box
- Silicon spatula
- Vegetable chopper
Ingredients used for the recipe
- Paneer 400 Grams
For the Gravy:
- Tomatoes (Roughly Chopped) 1 Cup or 6 Medium Sized
- Onion (Roughly Sliced) ½ cup or 1 Medium Sized
- Cashew Nuts 18 Pieces
- Ginger (Roughly Sliced) 1 Inch
- Garlic 2 Medium Pods
- Bay leaves 2 whole
- Cardamoms 4 Pieces
- Cloves 5 to 6 Pieces
- Salt ½ Teaspoon
- Sugar 1 Teaspoon
- Cooking Oil 2 Tablespoons
- Butter 1 Tablespoon
For the Tadka or Masala:
- Cooking Oil 2 Tablespoons
- Butter 2 Tablespoons
- Onion (Finely Chopped) ¼ Cup
- Kashmiri Red Chili Powder 2 Teaspoons
- Turmeric Powder ½ Teaspoon
- Coriander Powder 1 Teaspoon
- Salt ½ Teaspoon or As Per Taste
- Water ½ Cup
Finishing Touch:
- Garam Masala Powder 1 Teaspoon
- Kasuri Methi (Dried Fenugreek Leaves) 1 Teaspoon
- Coriander Leaves ¼ Cup
- Fresh Cream ⅓ Cup
Step By Step Cooking Procedures
- First, we need to soak 400 grams of paneer in warm salted water for 15 to 20 minutes. This will help defrost and season the paneer, making it nice and tender.
- While the paneer is soaking, let’s prepare the gravy. Heat up 2 tablespoons of oil and 1 tablespoon of butter (or just 2 tablespoons of butter) in a cooking pot. Once the oil is hot, add in 2 bay leaves, 4 cardamom pods, and 6 cloves. You can skip the oil and prepare the whole dish in butter only.
- When they start to release their aroma, add in some ginger slices, garlic pods, and onion slices along with green chili. Fry everything up for a few seconds before adding in some cashew nuts and chopped tomatoes. Season with salt and cook for 2 to 3 minutes on medium heat.
- Once the mixture has cooled down a bit, remove the bay leaves and blend it into a smooth paste in a mixer blender pot. Set the paste aside for now.
- Before we move on to the next step, be sure to drain the water from the paneer and set it aside for later.
- In a curry pot, heat up 1 tablespoon of oil and 1 tablespoon of butter (or just 2 tablespoons of butter). Add in some finely chopped onion and fry until it’s golden brown. Then, add in some Kashmiri red chili powder, coriander powder, and turmeric powder. If needed, add a little bit of water to make a nice mixture. Finally, add in some salt and cook until oil comes to the top.
- Now it’s time to add the masala paste we made earlier to the curry pot. Mix everything together well and add in some garam masala powder. After a minute of mixing, add ⅓ cup of fresh cream to the mixture. You can also add some butter here to make it extra glossy and delicious.
- Add some dried fenugreek leaves and chopped coriander to the mixture, and then add in the paneer cubes. Mix everything together well and add a little bit of water if needed to get the right consistency. Put the lid on and cook for 2 minutes on low to medium heat.
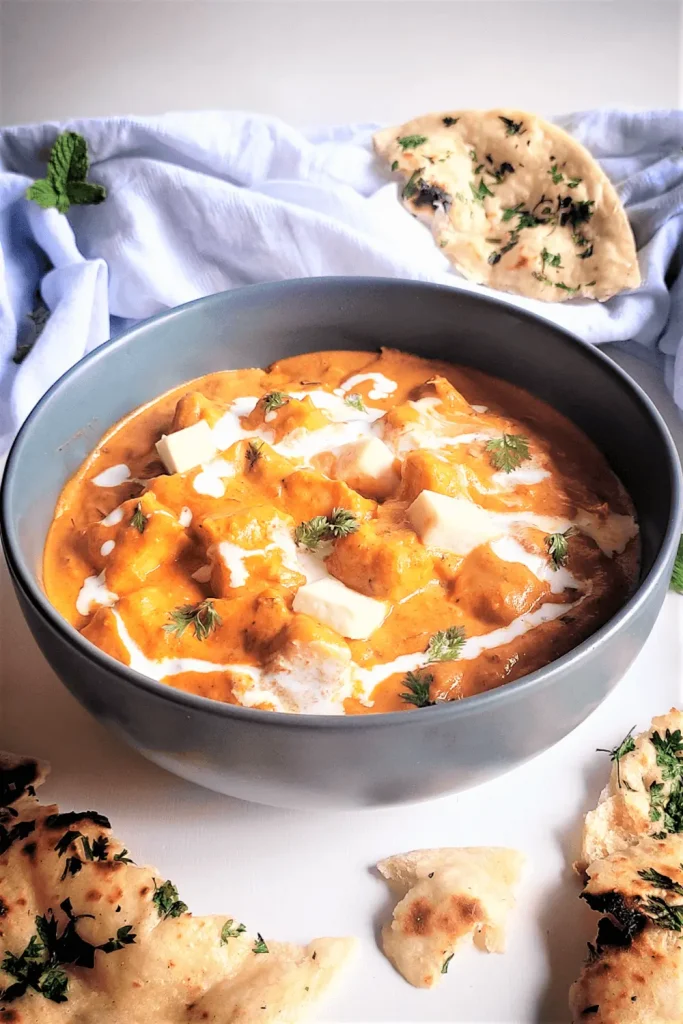
- And there you have it – a delicious and creamy Paneer Butter Masala!
More Recipes to try:
- Old Fashioned Pancake Recipe
- Lulu Cake Recipe
- Creamy Lemon Chicken Recipe
- Pepper Garlic Prawns Recipe
- Dal Khichdi Recipe (Hotchpotch)
- Thai Soup Recipe (with Chicken, Prawns, and Mushrooms)
- Authentic Indian Chicken Curry Recipe
- Masala Chai Recipe (Spiced Milk Tea)
- Homemade Dumplings Recipe
- Mango Smoothie Bowl Recipe
Recipe Card
Authentic Paneer Butter Masala Recipe: Make It at Home
Equipment
- Curry pot
- Mixer blender
- Air-tight jar
- Air-tight box
- Silicon spatula
- Vegetable chopper
Ingredients
- 400 grams Paneer
For the Gravy
- 1 cup Tomatoes roughly chopped
- ½ cup Onion roughly sliced
- 18 pieces Cashew nuts
- 1 inch Ginger roughly sliced
- 2 medium pods Garlic
- 2 whole Bay leaves
- 4 pieces Cardamom
- 5 pieces Cloves
- ½ tsp Salt
- 1 tsp Sugar
- 1 tbsp Butter
For the Tadka or Masala
- 2 tbsp Cooking oil
- 2 tbsp Butter
- ¼ cup Onion finely chopped
- 2 tsp Kashmiri Red Chili Powder
- ½ tsp Turmeric Powder
- 1 tsp Coriander Powder
- ½ tsp Salt
- ½ cup Water
Finishing Touch
- 1 tsp Garam Masala Powder
- 1 tsp Kasuri Methi (Dried Fenugreek Leaves)
- ¼ cup Coriander Leaves
- ⅓ cup Fresh Cream
Instructions
- First, Soak 400 grams of paneer in warm salted water for 15 to 20 minutes. This will help defrost and season the paneer, making it nice and tender.
- After socking, take 2 tablespoons of oil and 1 tablespoon of butter into a cooking pot. When the oil becomes a little hot, add 2 whole bay leaves, 4 pieces of cardamom, and 6 pieces of cloves. You can skip the oil and prepare the whole dish in butter only.
- When they start to release their aroma, add in some ginger slices, garlic pods, and onion slices along with green chili. Fry everything up for a few seconds before adding in some cashew nuts and chopped tomatoes. Season with salt and cook for 2 to 3 minutes on medium heat.
- Once the mixture has cooled down a bit, remove the bay leaves and blend it into a smooth paste in a mixer blender pot. Set the paste aside for now.
- Before we move on to the next step, be sure to drain the water from the paneer and set it aside for later.
- In a curry pot, heat up 1 tablespoon of oil and 1 tablespoon of butter (or just 2 tablespoons of butter). Add in some finely chopped onion and fry until it's golden brown. Then, add in some Kashmiri red chili powder, coriander powder, and turmeric powder. If needed, add a little bit of water to make a nice mixture. Finally, add in some salt and cook until oil comes to the top.
- Now add the masala paste (prepared earlier) to the tempering. After mixing everything well, add ½ teaspoon garam masala powder. Mix again. Pour little water. After a good 1 minute of mixing, add ⅓ Cup fresh cream to the gravy.
- Add some dried fenugreek leaves and chopped coriander to the mixture, and then add in the paneer cubes. Mix everything together well and add a little bit of water if needed to get the right consistency. Put the lid on and cook for 2 minutes on low to medium heat.
- And there you have it – a delicious and creamy Paneer Butter Masala!
This Paneer Butter Masala Recipe is so easy and simple! You will need only 15 minutes to complete the recipe. Whether you have it at lunch or dinner, it is an absolute hit for the day.
This is a good item for lunch boxes. So you can prepare it in large batches and store it for days in the refrigerator. The amazing taste will enlighten your mood and brighten up your day. Try the recipe today and enjoy it with your family and friends.
TRIED THIS RECIPE?
We love to see all the deliciousness!
Tag @gravyflavourofficial on Instagram and hashtag it #gravyflavourofficial
Lots of great info in this post. I love paneer and this “gravy” is amazing. YUM!
Glad you liked the post and the paneer recipe. Thanks for your comment! Enjoy your cooking.
That looks delicious! I’ll give it a try. Thanks for the detailed instructions. I often find recipes aren’t detailed enough
Beautiful and delicious! Thank you for sharing this paneer butter masala recipe!
Wow! This sounds amazing! I’ve never heard of Paneer but it sounds like something I would like!! I’ll be bookmarking this 🙂
I love paneer cheese! This butter Masala dish with paneer is delicious! This recipe has detailed instructions that is easy to follow.
Great recipe, thank you! I’m going to try make it tomorrow 🙂
That looks so tasty!
I’ve never made a dish like this before. I love Indian food, so it is good to know I can make this at home. Great information and the steps seem easy enough to follow. I’ll let you know how it turns out!
Thi looks so yummy and new to me. The look alone just makes me want to try it.
This looks amazing! I love that you went into so much detail but also made it sound simple enough for everyone to try!