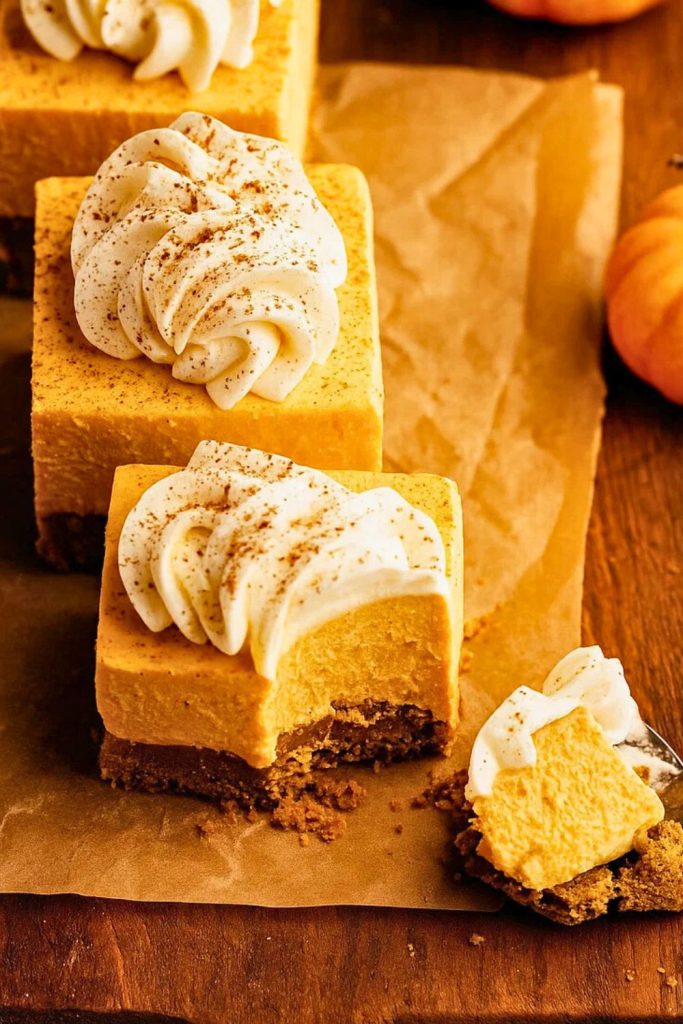
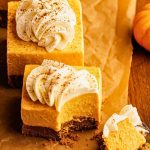
These No Bake Pumpkin Cheesecake Bars are smooth, rich, and full of warm fall flavors, yet they are unbelievably easy to make. They are perfect for when you want that classic pumpkin dessert without turning on the oven. This treat is creamy, gently spiced, and layered with a buttery graham cracker crust that makes every bite a little taste of autumn bliss.
The very first time I made these bars was during one of those crisp October weekends when all I wanted was something sweet and pumpkin-y, but I had no energy to fuss with baking. I was craving cheesecake, but my oven was already full with a savory roast. That is when the idea clicked. Why not create a chilled dessert that captures all the joy of pumpkin pie and cheesecake, but without the wait? The first bite was so luscious and satisfying that I knew it had to be shared. Ever since then, these bars have been my go-to quick dessert for gatherings, potlucks, or just because.
Why You’ll Love This
1. No baking required
If you have ever wished for cheesecake without the long baking time or fear of cracks, this is the recipe for you. Everything comes together in layers that set perfectly in the fridge. It is a wonderful solution for busy days or hot kitchens when you just do not want extra heat from the oven.
2. Perfect texture and flavor balance
These bars strike the perfect harmony between creamy cheesecake and light pumpkin pie filling. The cream cheese brings that classic tang, while the pumpkin puree and warm spices add comfort and richness. Each bite is velvety, flavorful, and perfectly sweet without being overwhelming.
3. Great make-ahead dessert
Because these bars need a few hours to chill, you can prepare them the day before serving. This makes them ideal for holiday planning or dinner parties when you want dessert ready in advance. They hold their shape beautifully, so you can slice and serve with confidence.
4. Crowd-pleasing and versatile
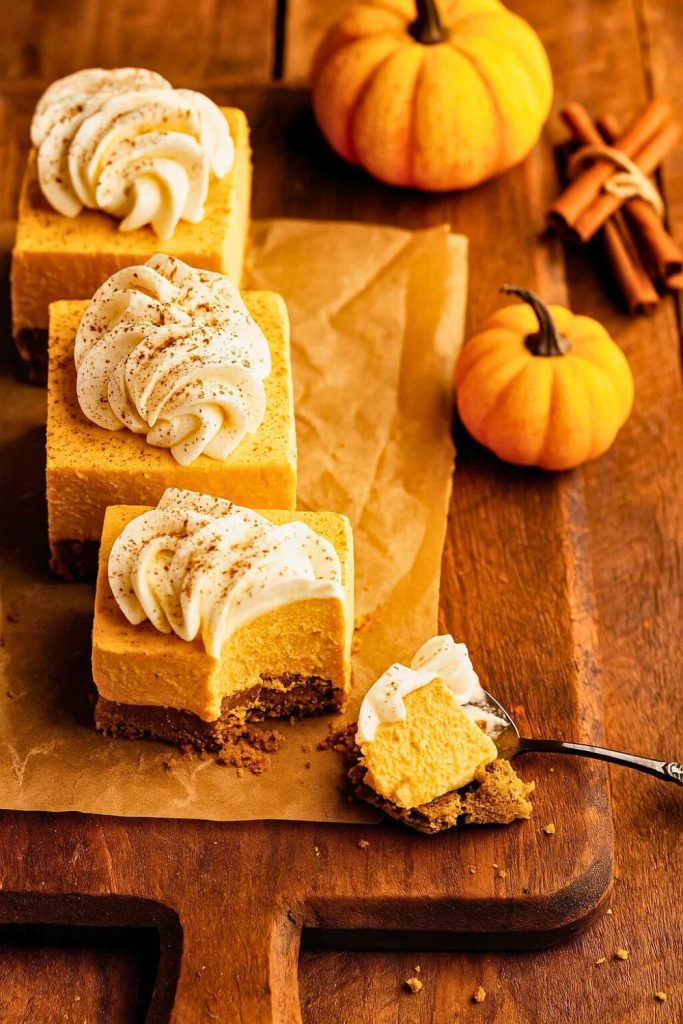
Everyone loves the cozy flavors of pumpkin spice, and these bars deliver it in a form that feels fresh and fun. You can dress them up with whipped cream and caramel drizzle, or keep them simple for a rustic touch. They work just as well for a casual family dessert as they do for a fancy celebration.
Recipe Details
Prep Time: 20 minutes
Cook Time: 0 minutes
Total Time: 4 hours 20 minutes (including chilling)
Cuisine Type: American, Dessert
Servings: 12 bars
Estimated Cost: Moderate
Equipment Needed
- 8×8 inch square baking pan
- Parchment paper
- Medium mixing bowls
- Electric mixer or hand whisk
- Rubber spatula
- Measuring cups and spoons
- Offset spatula (optional, for smooth layers)
Ingredients
For the crust
- 1 3/4 cups graham cracker crumbs (about 14 crackers)
- 1/3 cup granulated sugar
- 1/2 cup unsalted butter, melted
For the cheesecake layer
- 16 ounces cream cheese, softened to room temperature
- 1/2 cup powdered sugar
- 1 teaspoon pure vanilla extract
- 1 cup heavy whipping cream, whipped to stiff peaks
For the pumpkin layer
- 1 cup pumpkin puree (not pumpkin pie filling)
- 1/3 cup light brown sugar, packed
- 1 teaspoon ground cinnamon
- 1/4 teaspoon ground nutmeg
- 1/4 teaspoon ground ginger
- Pinch of ground cloves
- 1/2 cup whipped cream (from the above batch)
Notes: You can substitute gingersnap crumbs for a spicier crust. Use canned pumpkin for convenience, but make sure it is pure pumpkin puree. Store cream cheese in the fridge until just before use, then let it soften at room temperature for smooth blending.
Step-by-Step Instructions
Step 1
Line your baking pan with parchment paper, leaving some overhang on the sides so you can lift the bars out easily later. This small step makes a big difference when it comes time to slice and serve.
Step 2
In a medium bowl, combine the graham cracker crumbs and granulated sugar. Pour in the melted butter and stir until the mixture is evenly coated and resembles wet sand. This buttery crumb will form the foundation for your bars.
Step 3
Press the crust mixture firmly and evenly into the bottom of the prepared pan. You can use the bottom of a glass or measuring cup to pack it down tightly. Place the crust in the fridge to chill while you prepare the fillings.
Step 4
In another bowl, beat the softened cream cheese until smooth and creamy. Add the powdered sugar and vanilla, then beat again until fully combined. Gently fold in the whipped cream until the mixture is light and fluffy. This will be your cheesecake layer.
Step 5
Spread the cheesecake mixture evenly over the chilled crust, smoothing the top with an offset spatula if you have one. Return the pan to the fridge while you prepare the pumpkin layer.
Step 6
In a clean bowl, whisk together the pumpkin puree, brown sugar, and all the spices until well blended. Gently fold in the reserved whipped cream. Spread this mixture over the cheesecake layer, smoothing it out gently to avoid mixing the layers.
Step 7
Cover the pan with plastic wrap and refrigerate for at least 4 hours, or until fully set. For the best texture and clean slices, chill overnight. When ready to serve, lift the bars out of the pan using the parchment overhang and cut into squares with a sharp knife.
Nutrition Facts (per serving, approximate)
Calories: 280
Protein: 4g
Carbohydrates: 23g
Fiber: 1g
Fat: 19g
Sodium: 160mg
Vitamin A: 90% DV
Calcium: 8% DV
Iron: 4% DV
Tips for Success
1. Use room temperature cream cheese
Cold cream cheese can create lumps that are difficult to smooth out. Let it sit at room temperature for about 30 minutes before mixing.
2. Whip the cream to stiff peaks
For the lightest, most stable filling, whip your cream until it holds firm peaks. This helps the layers keep their structure when chilled.
3. Chill thoroughly
Rushing the chill time will result in soft, messy slices. Give the bars enough time in the fridge to set fully for clean, beautiful cuts.
4. Cut with a warm knife
For neat slices, run a sharp knife under hot water, dry it, then cut. Wipe and rewarm the knife between slices.
Common Questions
Can I make this ahead of time?
Yes, you can prepare the bars up to 24 hours in advance. They actually taste even better the next day.
What can I use instead of graham crackers?
You can use crushed gingersnaps, vanilla wafers, or even shortbread cookies for a different flavor profile.
Can I make these gluten-free?
Absolutely. Use gluten-free graham crackers or cookies for the crust. All other ingredients are naturally gluten-free.
How long do they last in the fridge?
These bars will stay fresh for up to 4 days if stored in an airtight container in the refrigerator.
Variations and Substitutions
- Swap the graham cracker crust for a gingersnap crust to add extra spice.
- Add a swirl of caramel sauce on top before chilling for a decadent twist.
- Use dairy-free cream cheese and coconut whipped cream for a vegan-friendly version.
- Add a handful of chopped pecans to the crust for a nutty crunch.
Serving and Pairing Suggestions
These bars are delicious on their own, but they shine even brighter when paired with something warm. Try serving them alongside hot apple cider or pumpkin spice lattes. For a plated dessert, add a dollop of whipped cream, a sprinkle of cinnamon, and maybe even a drizzle of caramel sauce. They also work beautifully as part of a fall dessert table with apple pie, pecan pie, and spiced cookies.
Storage and Reheating Tips
Store leftovers in an airtight container in the fridge for up to 4 days. To freeze, wrap individual bars in plastic wrap and place in a freezer-safe bag for up to 2 months. Thaw overnight in the fridge before serving. Since these are no bake, reheating is not needed, but you can let them sit at room temperature for 10 minutes before enjoying for the best texture.
No Bake Pumpkin Cheesecake Bars
Ingredients
For the crust
- 1 ¾ cups graham cracker crumbs about 14 crackers
- ⅓ cup granulated sugar
- ½ cup unsalted butter melted
For the cheesecake layer
- 16 ounces cream cheese softened to room temperature
- ½ cup powdered sugar
- 1 teaspoon pure vanilla extract
- 1 cup heavy whipping cream whipped to stiff peaks
For the pumpkin layer
- 1 cup pumpkin puree not pumpkin pie filling
- ⅓ cup light brown sugar packed
- 1 teaspoon ground cinnamon
- ¼ teaspoon ground nutmeg
- ¼ teaspoon ground ginger
- Pinch of ground cloves
- ½ cup whipped cream from the above batch
Instructions
- Line your baking pan with parchment paper, leaving some overhang on the sides so you can lift the bars out easily later. This small step makes a big difference when it comes time to slice and serve.
- In a medium bowl, combine the graham cracker crumbs and granulated sugar. Pour in the melted butter and stir until the mixture is evenly coated and resembles wet sand. This buttery crumb will form the foundation for your bars.
- Press the crust mixture firmly and evenly into the bottom of the prepared pan. You can use the bottom of a glass or measuring cup to pack it down tightly. Place the crust in the fridge to chill while you prepare the fillings.
- In another bowl, beat the softened cream cheese until smooth and creamy. Add the powdered sugar and vanilla, then beat again until fully combined. Gently fold in the whipped cream until the mixture is light and fluffy. This will be your cheesecake layer.
- Spread the cheesecake mixture evenly over the chilled crust, smoothing the top with an offset spatula if you have one. Return the pan to the fridge while you prepare the pumpkin layer.
- In a clean bowl, whisk together the pumpkin puree, brown sugar, and all the spices until well blended. Gently fold in the reserved whipped cream. Spread this mixture over the cheesecake layer, smoothing it out gently to avoid mixing the layers.
- Cover the pan with plastic wrap and refrigerate for at least 4 hours, or until fully set. For the best texture and clean slices, chill overnight. When ready to serve, lift the bars out of the pan using the parchment overhang and cut into squares with a sharp knife.
Notes
Cold cream cheese can create lumps that are difficult to smooth out. Let it sit at room temperature for about 30 minutes before mixing. 2. Whip the cream to stiff peaks
For the lightest, most stable filling, whip your cream until it holds firm peaks. This helps the layers keep their structure when chilled. 3. Chill thoroughly
Rushing the chill time will result in soft, messy slices. Give the bars enough time in the fridge to set fully for clean, beautiful cuts. 4. Cut with a warm knife
For neat slices, run a sharp knife under hot water, dry it, then cut. Wipe and rewarm the knife between slices.
The joy of these No Bake Pumpkin Cheesecake Bars is how effortlessly they fit into your life. They are the perfect treat for when you want something special but also want to keep things simple. Whether it is a holiday feast, a weekend gathering, or a personal craving, this recipe brings comfort, flavor, and a touch of indulgence without stress. I hope you enjoy making them as much as I do. Thank you for sharing this little moment in the kitchen with me, and happy dessert making.