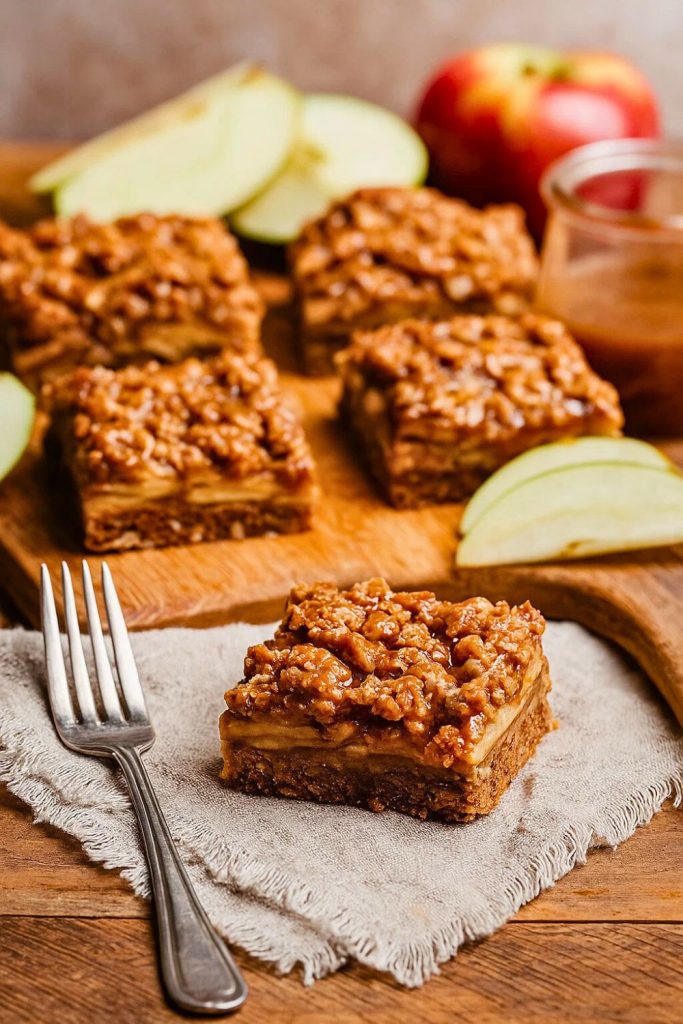
Apple pie bars bring all the cozy comfort of classic pie in an easy sliceable treat. Each square is filled with soft spiced apples, a buttery crust, and a crumbly topping that makes them feel both homey and special. These bars are perfect for gatherings, afternoon snacks, or a sweet little bite after dinner.
There is something about the mix of warm apples and cinnamon that feels like a hug on a plate. I first made these when I wanted the taste of apple pie but without the fuss of rolling dough. They became an instant favorite in my kitchen and now they are a go to recipe whenever I want to share something sweet and simple with friends.
Why You’ll Love This
1. Comforting flavors
These bars have the nostalgic taste of apple pie without the effort of making a full pie. The apples are tender and spiced just right, giving you that familiar cozy flavor in each bite. Every square is like a little piece of fall that can be enjoyed any time of year.
2. Easy to make
Instead of rolling and shaping pie crust, the base and topping are pressed into the pan. This means less stress and fewer steps while still giving you that buttery crust and crumble texture. It is approachable for new bakers and still satisfying for experienced ones.
3. Perfect for sharing
Because these are baked in a pan and cut into bars, they are portable and easy to serve. They make a wonderful option for potlucks, school lunches, bake sales, or family gatherings. No messy slicing of pie is needed.
4. Flexible recipe
You can adjust the spices to your taste, try different apples, or even add nuts for a crunchy twist. These bars can easily be made ahead and stored, making them convenient for meal planning or prepping treats in advance.
Recipe Details
Prep Time: 20 minutes
Cook Time: 40 minutes
Total Time: 1 hour
Cuisine Type: American, Dessert
Servings: 12 to 16 bars
Estimated Cost: Medium, depends on apple variety
Equipment Needed:
- 9×13 baking pan
- Mixing bowls
- Measuring cups and spoons
- Wooden spoon or spatula
- Knife and cutting board
- Whisk
- Oven mitts
- Cooling rack
- Optional: food processor for quick crust mixing
Ingredients
- 2 1/2 cups all purpose flour
- 1 cup unsalted butter, softened
- 1/2 cup granulated sugar
- 1/2 cup light brown sugar, packed
- 1 teaspoon baking powder
- 1/2 teaspoon salt
- 2 large eggs
- 6 cups apples, peeled and sliced thin (Granny Smith or Honeycrisp work best)
- 1/2 cup granulated sugar (for apples)
- 2 teaspoons ground cinnamon
- 1/4 teaspoon ground nutmeg
- 1 teaspoon lemon juice
- Optional: 1/2 cup chopped walnuts or pecans
- Optional: drizzle of caramel sauce for topping
Notes: You can use a mix of apple varieties for a deeper flavor. If you prefer less sugar, reduce by a few tablespoons. Keep the butter cold for a flakier crust.
Step-by-Step Instructions
Step 1: Prepare the oven and pan
Preheat your oven to 350°F and lightly grease a 9×13 pan or line it with parchment paper. This makes cleanup easier and ensures the bars lift out smoothly.
Step 2: Make the crust and topping
In a large bowl, whisk together the flour, baking powder, and salt. Add the butter, sugar, and brown sugar. Mix until crumbly. Add the eggs and stir until the mixture holds together but is still crumbly. Set aside about 1 1/2 cups of this mixture for the topping.
Step 3: Press the crust
Take the remaining crust mixture and press it firmly into the bottom of your pan. Use your hands or the back of a spoon to create an even layer. This will be the base that holds the apples.
Step 4: Prepare the apple filling
In another bowl, combine the sliced apples with sugar, cinnamon, nutmeg, and lemon juice. Stir until the apples are evenly coated and glossy with spice. This mixture should smell amazing already.
Step 5: Layer the apples
Spread the apple filling evenly over the crust layer in the pan. Make sure the apples cover the crust fully, reaching the edges. This helps each bar get a balanced bite.
Step 6: Add the topping and bake
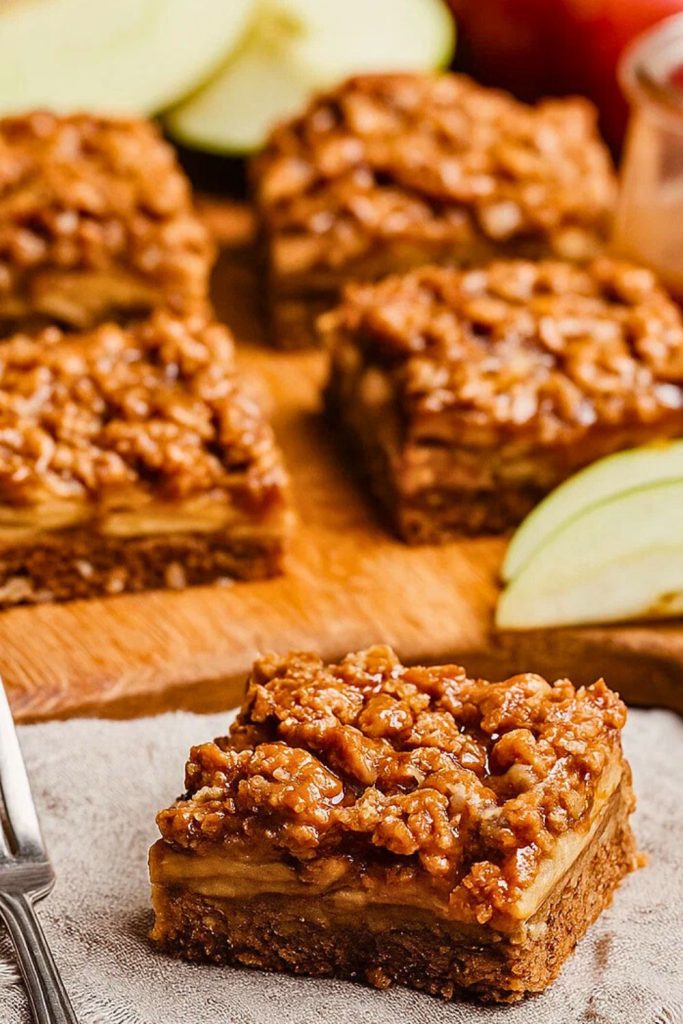
Sprinkle the reserved crust mixture evenly over the apples. You can also add nuts at this stage for extra crunch. Bake for about 40 minutes until the top is golden and the apples are bubbling slightly. Remove from the oven and let cool completely before slicing.
Step 7: Slice and serve
Once cooled, cut into squares or rectangles. For a little extra treat, drizzle caramel sauce on top or serve with a scoop of vanilla ice cream.
Nutrition Facts (per bar, about 1 of 16)
Calories: 260
Protein: 3 g
Carbohydrates: 38 g
Fiber: 2 g
Fat: 11 g
Sodium: 120 mg
Vitamin A: 6 percent DV
Vitamin C: 8 percent DV
Calcium: 2 percent DV
Iron: 6 percent DV
Tips for Success
Use firm apples so they hold their shape and do not turn mushy while baking. Granny Smith and Honeycrisp are top choices.
Cool the bars before slicing so the filling sets. Cutting too soon can cause them to fall apart.
Line the pan with parchment paper for easy lifting. This trick makes removing and cutting bars neat and simple.
Keep a portion of the crust mixture crumbly for the topping. This gives the bars a rustic bakery style look and adds texture.
Common Questions
Can I use canned apple pie filling instead of fresh apples?
Yes, you can, but the flavor and texture are best with fresh apples. If using canned filling, reduce the sugar in the crust.
How long do these bars last?
They stay fresh for about three days at room temperature or up to five days in the fridge. Store in an airtight container.
Can I freeze apple pie bars?
Yes, slice them first and wrap individually in plastic wrap. Place in a freezer safe bag for up to three months. Thaw in the fridge overnight.
Can I make this recipe gluten free?
Yes, just use a 1 to 1 gluten free flour blend. The results are slightly more crumbly but still delicious.
Variations and Substitutions
Swap part of the apples with pears for a softer filling.
Add dried cranberries or raisins to the apple layer for extra sweetness.
Mix in oats with the topping for a heartier crumble texture.
Try pumpkin pie spice instead of cinnamon and nutmeg for a seasonal twist.
Serving and Pairing Suggestions
Serve these bars warm with a scoop of vanilla or cinnamon ice cream for a classic dessert.
Pair them with hot apple cider for a cozy autumn feel.
For a lighter option, enjoy a square with a cup of green tea or black coffee.
They also work beautifully as part of a holiday dessert spread next to pumpkin or pecan treats.
Storage and Reheating Tips
Store leftover bars in an airtight container at room temperature for up to three days. For longer storage, keep in the fridge. To reheat, place a square in the microwave for about 15 seconds or warm in a low oven for a few minutes. Freezing works well too, just wrap tightly to prevent freezer burn.
Apple pie bars have a way of bringing people together. They remind us of classic flavors but in a form that is easier to make and share. I love serving them during the holidays, but honestly they are just as welcome on a random Tuesday night. I hope you give these a try soon and share them with people you care about. Thank you for visiting my kitchen today and happy baking.