When the weather cools down and the leaves start to turn, there’s something so satisfying about warm, oven baked meals that fill your kitchen with the most delicious smells. This Baked Chicken with Apples is one of those recipes. It’s sweet, savory, and simple, with juicy chicken breasts, tender apples, and just the right touch of herbs and spice.
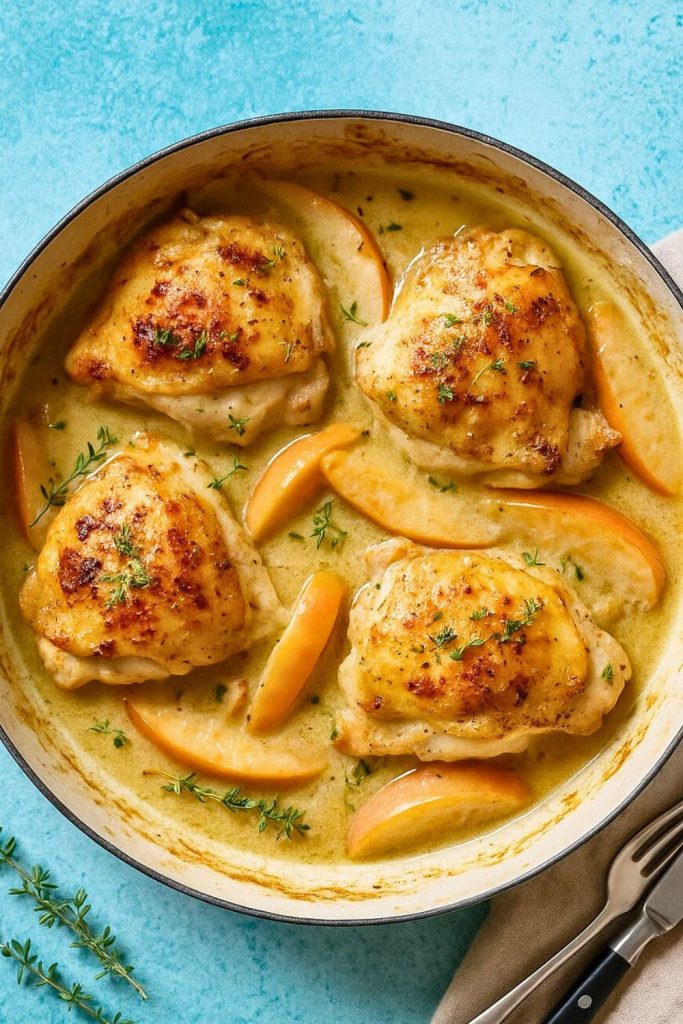
There’s something magical about how apples transform in the oven.
They soak up the savory flavors from the chicken, garlic, and thyme while releasing their natural sweetness into the sauce.
Paired with golden onions and just a splash of apple cider vinegar, the whole dish gets this beautiful balance of flavors that feels rustic yet elegant.
This is a one-pan meal that doesn’t ask for much, but it gives back so much.
Let me tell you how this one came to life in my kitchen.
I first made this recipe on a whim during apple season, when our fridge was overflowing with apples from a weekend orchard trip.
I had some chicken breasts in the freezer, a lonely onion on the counter, and not much else planned.
I decided to throw them all together with a little seasoning and pop it in the oven.
And the result? A total weeknight miracle.
The aroma that came out of the oven was incredible.
That blend of savory roasted chicken and sweet caramelized apples reminded me of something you’d get at a farmhouse dinner.
Ever since that day, it’s become one of my go-to recipes when I want something comforting, wholesome, and a little bit special.
Now I make it every fall, sometimes with pork chops, sometimes with extra veggies.
But this chicken version is the one that started it all.
Why You’ll Love This
1. Sweet and Savory Perfection
The flavor combo here is just so good. The natural sweetness of the apples plays beautifully against the savory notes of garlic, thyme, and juicy chicken. A touch of apple cider vinegar brightens everything up and adds just the right bit of tang to balance the dish.
2. One-Pan, Low-Mess Dinner
Everything comes together in one pan or baking dish, which means fewer dishes to wash. It’s the kind of meal that looks and tastes like you put in tons of effort, but really, it’s just some slicing, seasoning, and baking. Perfect for busy weeknights.
3. Family-Friendly and Crowd-Pleasing
Even picky eaters tend to love this. The apples get soft and jammy, the chicken stays juicy, and the whole dish has this mild, comforting flavor that appeals to everyone. Plus, it’s gluten-free and can easily be adapted to fit other dietary needs.
4. Fall-Inspired but Year-Round Friendly
While this dish sings in the fall with seasonal apples, it’s honestly great any time of year. You can use whatever apples are available, and the ingredients are simple pantry staples. It’s hearty enough for cold months but light enough to serve all year long.
Recipe Details
Prep Time: 15 minutes
Cook Time: 35 minutes
Total Time: 50 minutes
Cuisine Type: American, Comfort Food
Servings: 4
Estimated Cost: $12–15
Equipment Needed:
- Large oven-safe skillet or 9×13 baking dish
- Chef’s knife
- Cutting board
- Tongs or spatula
- Aluminum foil (optional)
- Meat thermometer (optional but helpful)
Ingredients
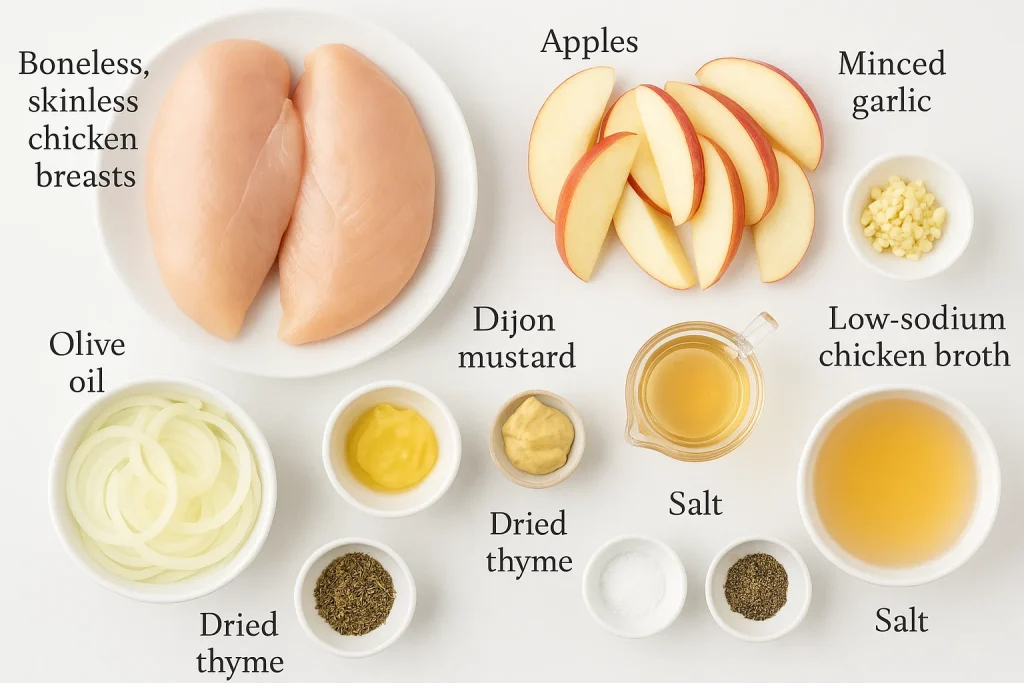
- 4 boneless, skinless chicken breasts (or thighs if preferred)
- 2 tablespoons olive oil
- 1 large yellow onion, thinly sliced
- 2 garlic cloves, minced
- 2–3 crisp apples (like Honeycrisp or Fuji), cored and sliced
- 1 tablespoon Dijon mustard
- 2 tablespoons apple cider vinegar
- ½ cup low-sodium chicken broth
- 1 teaspoon dried thyme (or 1 tablespoon fresh)
- Salt and black pepper, to taste
- Optional: pinch of cinnamon or nutmeg for extra warmth
- Optional garnish: fresh thyme or chopped parsley
Ingredient Notes:
- Apples: Choose firm, crisp apples so they don’t turn to mush while baking.
- Chicken: Thighs are juicier and more forgiving, but breasts work beautifully here too.
- Apple Cider Vinegar: Adds tang and depth. You could also use white wine or lemon juice in a pinch.
- Broth: Use low-sodium so you can better control the salt levels.
Step-by-Step Instructions
Step 1: Preheat and Prep
Start by preheating your oven to 400°F (200°C). Lightly grease your baking dish or skillet with a drizzle of olive oil. Pat the chicken dry with paper towels and season both sides with salt, pepper, and a little thyme.
Step 2: Sear the Chicken
Heat 1 tablespoon of olive oil in a large skillet over medium-high heat. Sear the chicken for 2–3 minutes per side, just until it gets some golden color. You’re not cooking it all the way through here, just locking in that flavor.
Step 3: Sauté the Aromatics
Remove the chicken from the pan and set it aside. In the same skillet, add another drizzle of olive oil, then toss in the sliced onion and garlic. Cook for about 4 minutes, until softened and fragrant. Stir in the apple cider vinegar and Dijon mustard and let it simmer for a minute.
Step 4: Layer and Add Apples
Spread the onion mixture across the bottom of your baking dish. Place the seared chicken breasts on top, then arrange the apple slices all around and on top of the chicken. Pour in the chicken broth and sprinkle a little extra thyme, salt, and a pinch of cinnamon if using.
Step 5: Bake to Perfection
Cover the dish loosely with foil and bake for 20 minutes. Then uncover and bake for another 10–15 minutes, until the chicken is fully cooked through and reaches 165°F. The apples should be soft and slightly caramelized.
Step 6: Rest and Serve
Let the chicken rest for about 5 minutes before serving. Spoon some of the apple-onion mixture and pan juices over each portion. Garnish with fresh herbs if you’d like, and serve warm.
Nutrition Facts (per serving)
- Calories: 360
- Protein: 32g
- Carbohydrates: 20g
- Fiber: 3g
- Fat: 16g
- Sodium: 420mg
- Vitamin A: 6% DV
- Vitamin C: 15% DV
- Calcium: 4% DV
- Iron: 8% DV
Tips for Success
1. Don’t skip the sear.
Browning the chicken first gives it a deeper flavor and helps it stay juicy during baking. It’s just a few extra minutes but makes a big difference.
2. Choose the right apples.
Go for firm, crisp apples like Honeycrisp, Fuji, or Pink Lady. Softer apples like McIntosh may break down too much in the oven.
3. Use a meat thermometer.
To avoid dry chicken, use a thermometer to check for doneness. Chicken is perfect at 165°F.
4. Let it rest.
Give your chicken a few minutes to rest after baking so the juices redistribute and stay in every bite.
Common Questions
Can I use bone-in chicken?
Absolutely. Bone-in chicken thighs or breasts work great. Just increase the bake time by about 10–15 minutes and make sure the internal temp reaches 165°F.
Is this dish gluten-free?
Yes, it’s naturally gluten-free as long as your broth and Dijon mustard are gluten-free certified.
How do I store leftovers?
Store leftovers in an airtight container in the fridge for up to 4 days. Reheat gently in the microwave or oven at 300°F until warmed through.
Can I freeze it?
Yes! You can freeze it for up to 2 months. Thaw overnight in the fridge and reheat in a covered baking dish.
Variations and Substitutions
- Use pork chops: This exact method works wonderfully with thick-cut boneless pork chops.
- Add vegetables: Try tossing in thinly sliced sweet potatoes or carrots for a more complete one-pan meal.
- Make it creamy: Add a splash of heavy cream to the broth before baking for a creamier sauce.
- Spice it up: Add a pinch of red pepper flakes or swap the thyme for rosemary for a more herbaceous twist.
Serving and Pairing Suggestions
This dish is delicious served with:
- Creamy mashed potatoes
- Wild rice or herbed couscous
- Roasted Brussels sprouts or green beans
- A glass of chilled apple cider or a dry white wine like Sauvignon Blanc
Storage and Reheating Tips
- Fridge: Store in an airtight container for up to 4 days.
- Freezer: Freeze in portions for up to 2 months.
- Reheat: Warm in a 300°F oven, covered with foil, for 15–20 minutes. You can also reheat gently on the stovetop with a splash of broth.

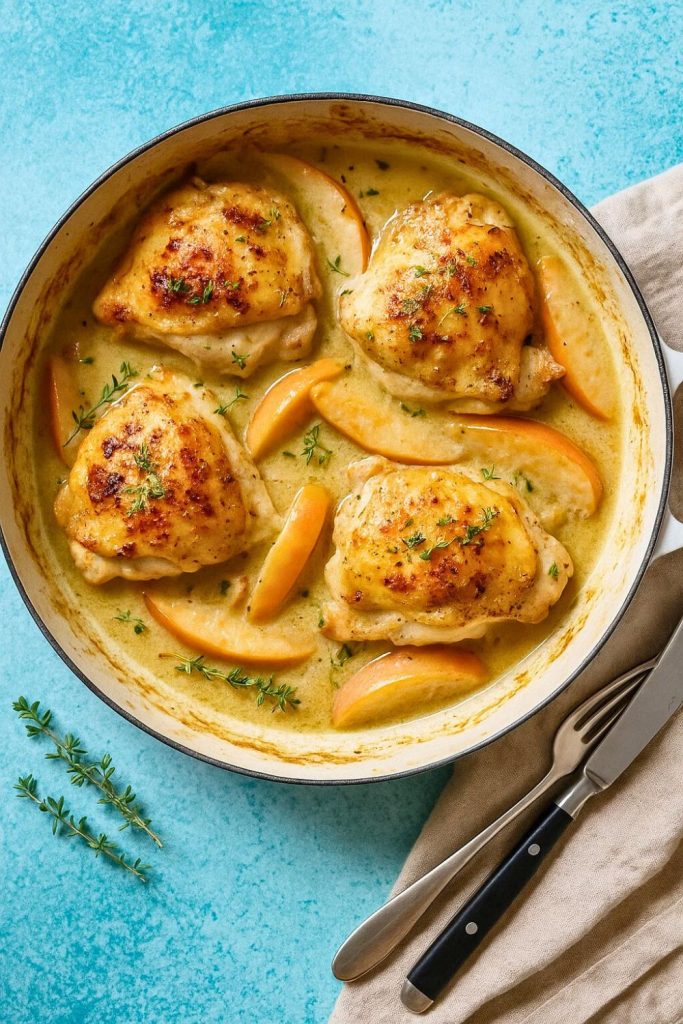
Baked Chicken with Apples
Ingredients
- 4 boneless skinless chicken breasts (or thighs if preferred)
- 2 tablespoons olive oil
- 1 large yellow onion thinly sliced
- 2 garlic cloves minced
- 2 –3 crisp apples like Honeycrisp or Fuji, cored and sliced
- 1 tablespoon Dijon mustard
- 2 tablespoons apple cider vinegar
- ½ cup low-sodium chicken broth
- 1 teaspoon dried thyme or 1 tablespoon fresh
- Salt and black pepper to taste
- Optional: pinch of cinnamon or nutmeg for extra warmth
- Optional garnish: fresh thyme or chopped parsley
Instructions
- Start by preheating your oven to 400°F (200°C). Lightly grease your baking dish or skillet with a drizzle of olive oil. Pat the chicken dry with paper towels and season both sides with salt, pepper, and a little thyme.
- Heat 1 tablespoon of olive oil in a large skillet over medium-high heat. Sear the chicken for 2–3 minutes per side, just until it gets some golden color. You’re not cooking it all the way through here, just locking in that flavor.
- Remove the chicken from the pan and set it aside. In the same skillet, add another drizzle of olive oil, then toss in the sliced onion and garlic. Cook for about 4 minutes, until softened and fragrant. Stir in the apple cider vinegar and Dijon mustard and let it simmer for a minute.
- Spread the onion mixture across the bottom of your baking dish. Place the seared chicken breasts on top, then arrange the apple slices all around and on top of the chicken. Pour in the chicken broth and sprinkle a little extra thyme, salt, and a pinch of cinnamon if using.
- Cover the dish loosely with foil and bake for 20 minutes. Then uncover and bake for another 10–15 minutes, until the chicken is fully cooked through and reaches 165°F. The apples should be soft and slightly caramelized.
- Let the chicken rest for about 5 minutes before serving. Spoon some of the apple-onion mixture and pan juices over each portion. Garnish with fresh herbs if you’d like, and serve warm.
Notes
Browning the chicken first gives it a deeper flavor and helps it stay juicy during baking. It’s just a few extra minutes but makes a big difference. 2. Choose the right apples.
Go for firm, crisp apples like Honeycrisp, Fuji, or Pink Lady. Softer apples like McIntosh may break down too much in the oven. 3. Use a meat thermometer.
To avoid dry chicken, use a thermometer to check for doneness. Chicken is perfect at 165°F. 4. Let it rest.
Give your chicken a few minutes to rest after baking so the juices redistribute and stay in every bite.
It’s hard not to fall in love with this baked chicken and apples recipe.
It’s warm, flavorful, and exactly the kind of meal that brings everyone to the table.
Whether you’re making it for a quiet evening at home or a cozy dinner with friends, it’s bound to become a favorite.
I hope you give it a try and love it as much as we do. Let me know in the comments if you try any fun twists or have a favorite apple to use.
Thanks so much for being here and cooking along with me.
Happy baking, friend!